Fix Kernel Security Check Failure In Windows 11
In this article, we will be discussing all the ways using which you can fix Kernel Security Check Failure in Windows 11.
1 Fix Kernel Security Check Failure In Windows 111.1 Update Windows1.2 Run SFC Scan1.3 Run CHKDSK 1.4 Run Windows Memory Diagnostic Tool1.5 Update Drivers1.6 Scan Your PC For Virus1.7 Reset PC 1.8 Conclusion
Update Windows
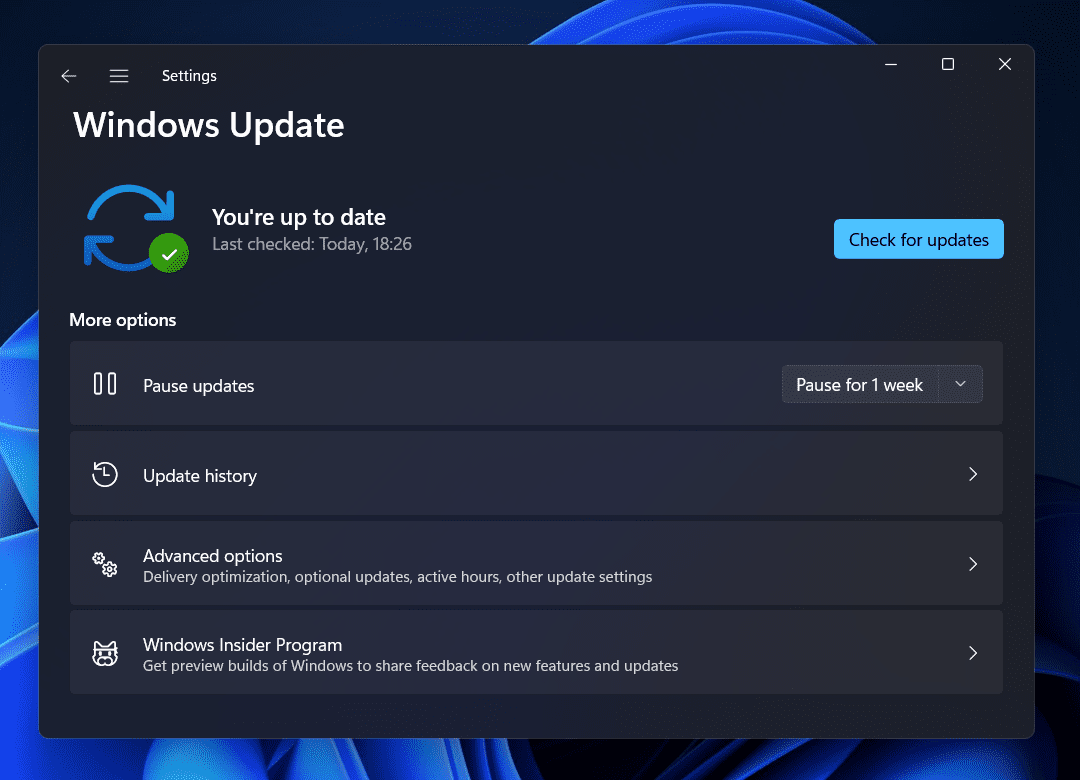
The very first thing that you should try doing is updating Windows. Outdated Windows may be the reason behind you facing the issue. Follow the steps given below to update the Windows-
Open the Settings app on your Windows 11 PC by pressing the Windows + I key combo. Head to the Windows Update section on the left sidebar and click on the Check for updates section on the right side.
Now, download and install all the updates your PC finds. After installing the updates, restart your PC, and the issue should be fixed by now.
Run SFC Scan
You can run an SFC scan to fix the issue. If this BSOD error is caused due to corrupted system files, then the SFC scan may fix the error. To run SFC scan, follow the steps given below-
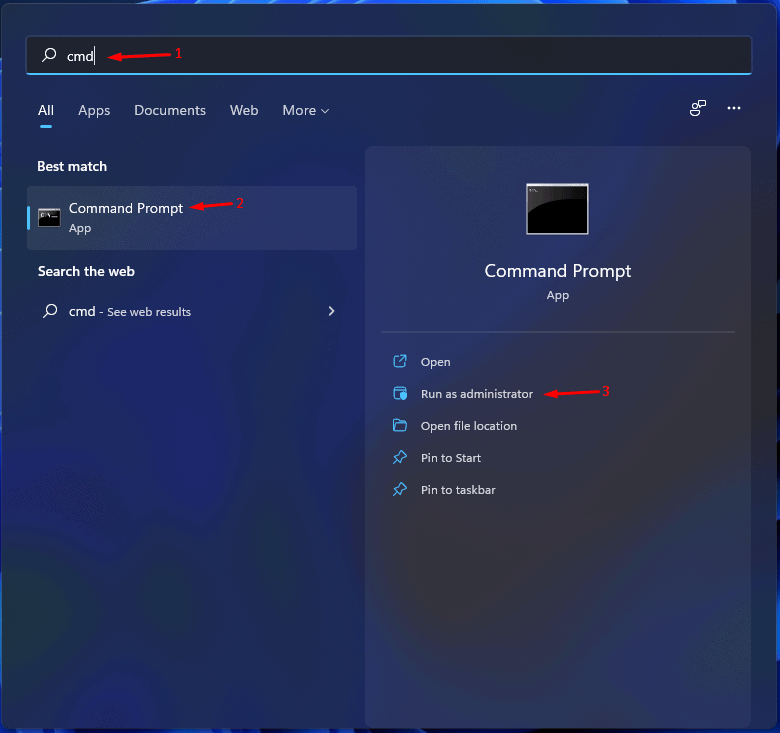
Firstly, run the Command Prompt as administrator. To do so, search for CMD in the Start Menu. Right-click on the Command Prompt from the search result and click on Run as administrator.
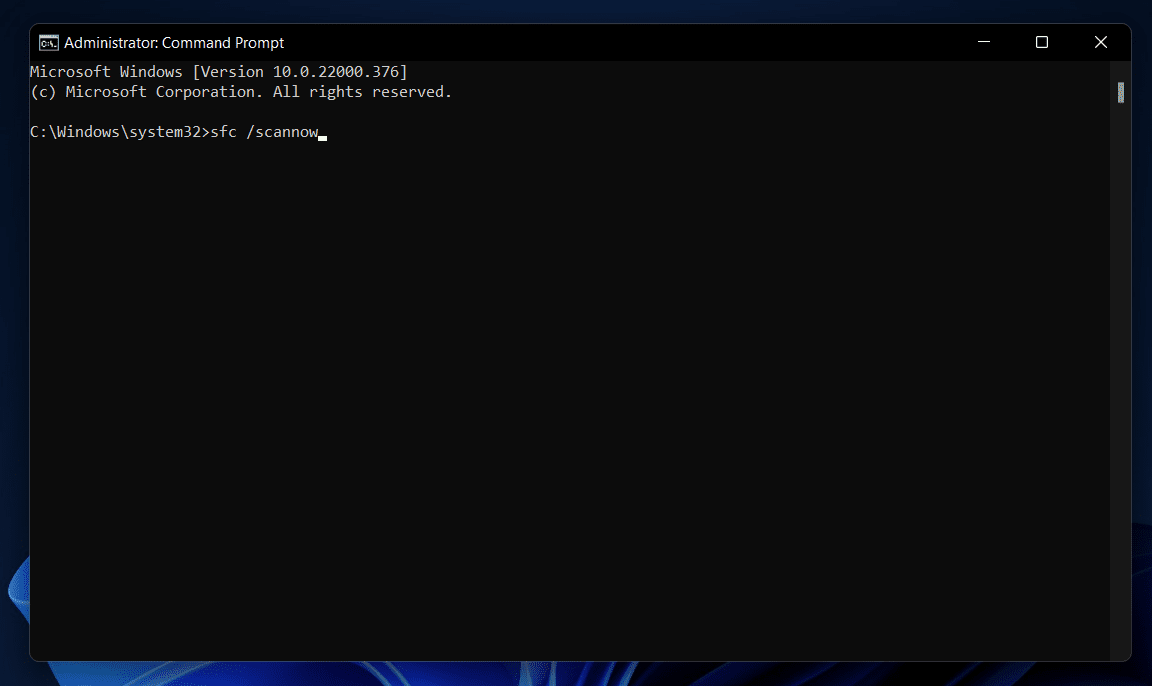
In the Command Prompt, type the command sfc /scannow and hit Enter to run the SFC scan.
Wait until the process completes, and then restart your PC
Run CHKDSK
You can also run CHKDSK to fix the Kernel Security Check Failure error in Windows 11. To do so, follow the steps given below-
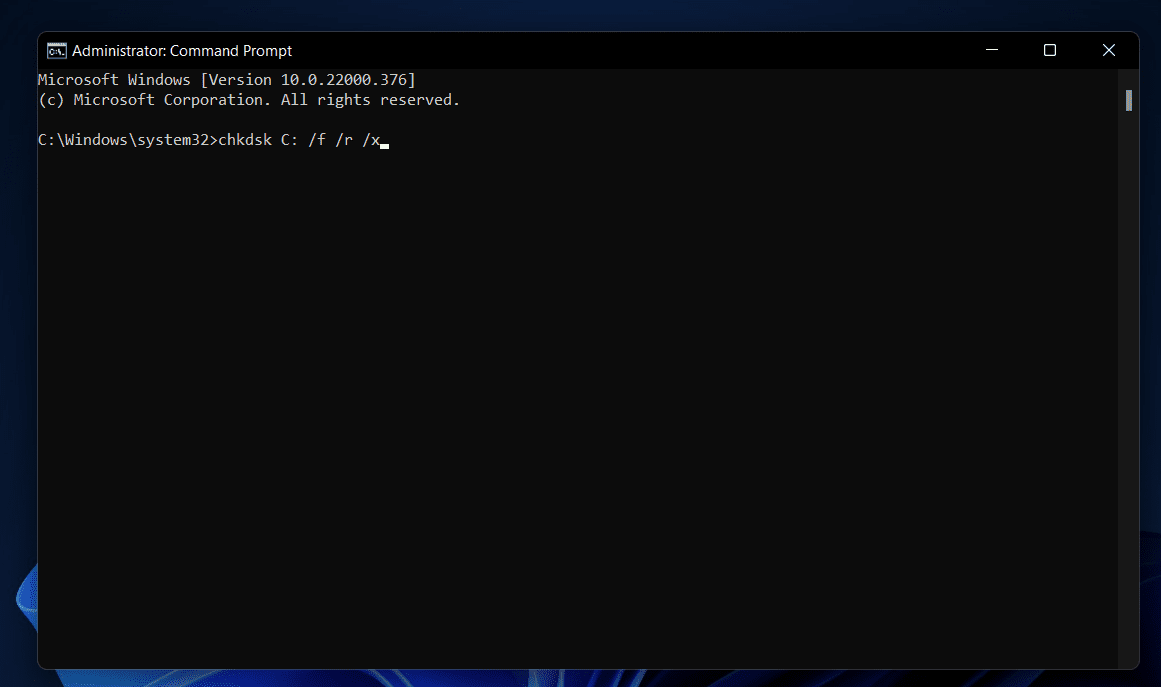
Open the Start menu by pressing the Windows key. In the Start Menu, search for CMD. Now right-click on the Command Prompt and then click on Run as administrator. In the Command Prompt, execute the command chkdsk C: /f /r /x
Wait for the process to complete. Now close the command prompt, and then restart your PC.
Run Windows Memory Diagnostic Tool
If you face this issue due to faulty memory, you should try running the Windows Memory Diagnostic Tool. Windows Memory Diagnostic Tool analyzes the issue with the memory and fixes it. To run the Windows Memory Diagnostic Tool, follow the steps given below-
Press the Windows key to open the Start Menu. In the Start Menu, search for Windows Memory Diagnostic and click on the relevant search result to open the tool.
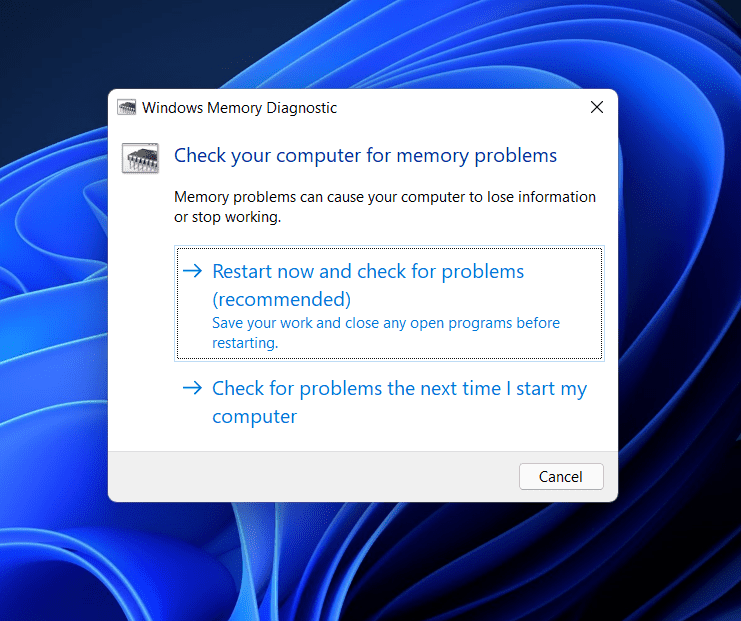
You will now see two options. If you want to restart now and check for the problems, click on Restart now and check for problems option. However, if you want to analyze the issue the next time you start your PC, click on Check for problems the next time I start my computer option.
This should fix your memory, thus fixing the Kernel Security Failure in Windows 11.
Update Drivers
Another thing that you can try doing is updating drivers. You can use third-party apps to update the drivers on your PC. Apps like Driver Booster or DriverPack Solution can help you download and install the latest drivers for your PC. You can also download the drivers from the official websites of the product you are using. If you have a laptop, you can head to the official website of your laptop and then download the drivers from there. Another way to update drivers is in the optional update section. When you update the Windows, you will see an optional updates section. This is where you will find the latest drivers for your PC. Download and install all the driver’s update, and then restart your PC. This should most probably fix the Kernel Security Check Failure in Windows 11.
Scan Your PC For Virus
You may also face the issue due to a virus on your PC. Therefore, you should prefer scanning your PC for viruses to fix the issue. You can use Windows Security software to scan your PC for the virus. You can use third-party antivirus on your PC to scan for viruses and fix the issue.
Reset PC
If any of the above steps didn’t help you solve the issue, the last resort would be resetting your PC. To reset your PC, follow the steps given below-
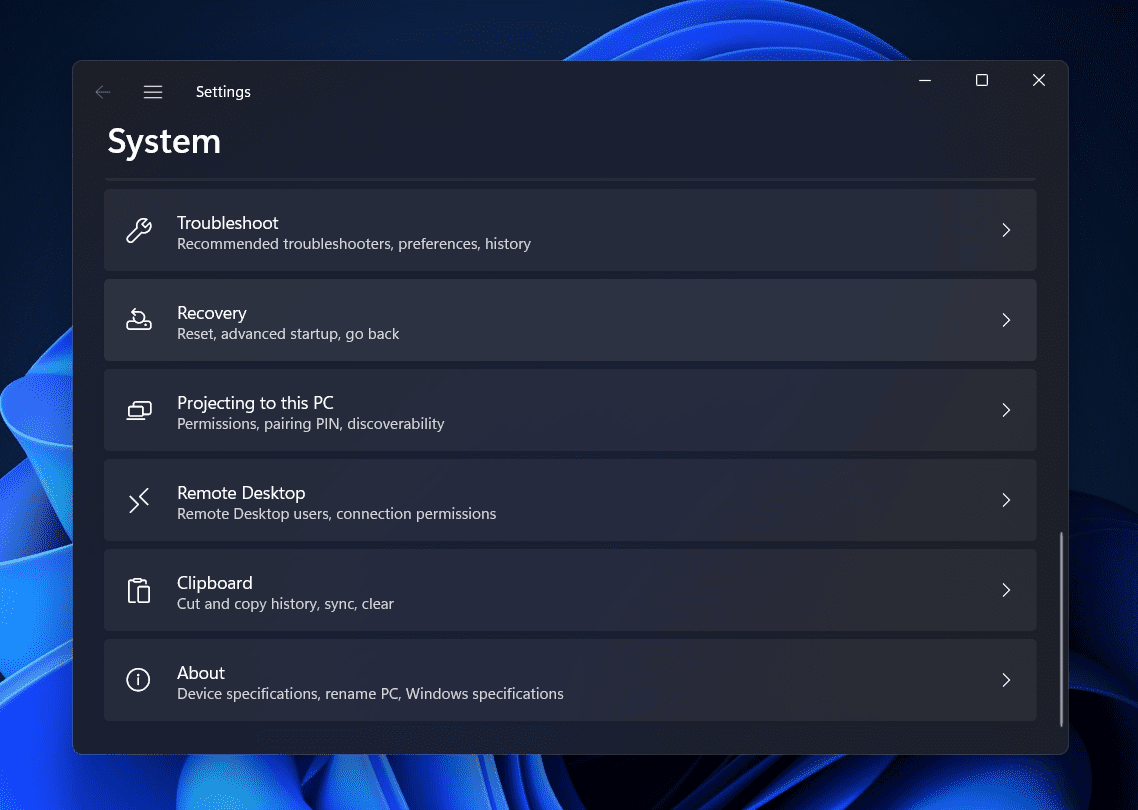
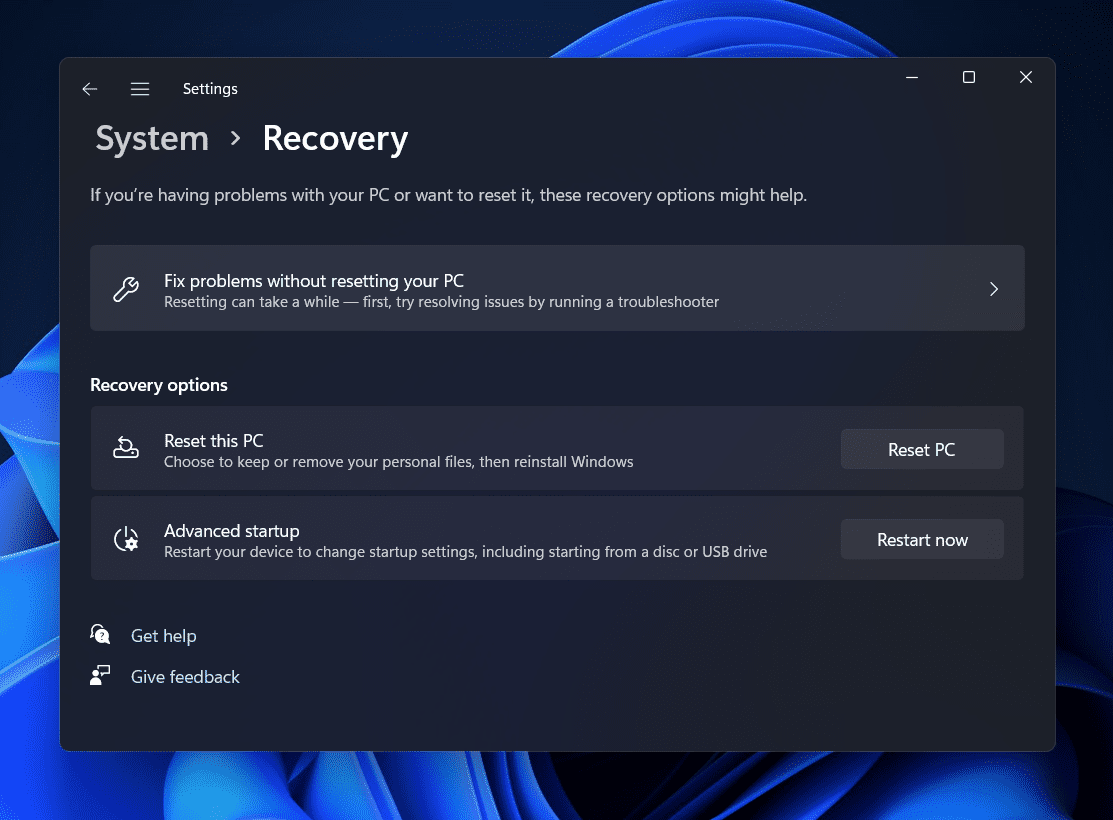
Open the Settings app by pressing the Windows + I key combo. Next, click on the Recovery option on the right sidebar of the Settings app.
On the next screen, click on the Reset PC button.
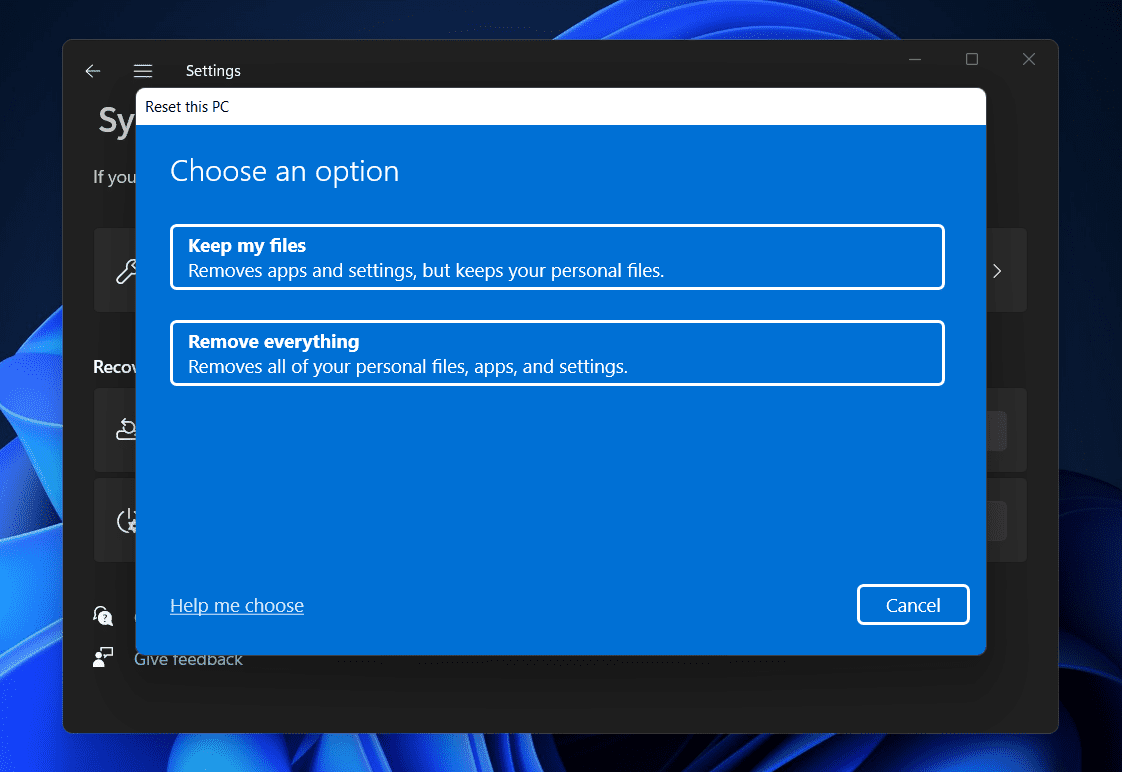
You will now see two options- Keep my files and Remove Everything. Select any options as per your preferences, and then follow the on-screen instructions to reset your PC.
Once done, the issue will be fixed.
You can either reinstall Windows 11 if resetting didn’t work for you. Reinstalling Windows 11 can be another workaround to fix Kernel Security Check Failure in Windows 11. RELATED GUIDES:
How To Download and Install Safari on Windows 11How To Fix Screen Flickering Issues In Windows 11How To Fix IRQL_NOT_LESS_OR_EQUAL Error In Windows 11Fix Hotkeys (Fn Keys) Not Working On Windows 11 Laptop
Conclusion
If you face the Kernel Security Check Failure issue in Windows 11, you can prefer following the steps in this article to fix the issue. We have discussed all the ways you will be able to fix the issue you have been facing.
Δ
