Installing Connect App In Windows 11
You can easily install the Connect app on your Windows 11 PC from the Settings app. The wireless display feature is disabled by default in Windows 11, because of which, you will not find the Connect app on your PC. This feature can easily be enabled from the Settings app, and you will get the Connect app. To do so, follow the steps given below-
1 Installing Connect App In Windows 111.1 Customizing Project Settings And Using Connect App1.2 Uninstalling Wireless Display2 Final Words
Firstly, open the Settings app on your PC. You can do so by pressing the Windows + I key combo (keyboard shortcut to open the Settings app on Windows.On the left sidebar of the Settings app, click on Apps.Now on the right side of the Apps section, click on Optional features.
On the next screen, click on the View features button next to the Add an optional feature.
In the search bar, search for Wireless display. Now check the checkbox that you see right next to the Wireless Display.
Once done, click on Next and click on Install to add the feature.You will now see the Wireless Display as Installed under the Recent Actions.
Customizing Project Settings And Using Connect App
Now that you have enabled the Wireless Display, you can easily customize the Project Settings and use the Connect app. You will have to customize the project settings before using the Connect app. To customize Project Settings and use Connect app, follow the steps given below-
Open the Start Menu app on your Windows 11 PC by pressing the Windows key.In the Start Menu, search for Projection Settings and click on the first option from the search result.
Click on the drop-down menu saying Always Off (Recommended) and select Available everywhere or Available everywhere on secure networks.
Now that you have customized the projection settings, you can use the Connect app. Given below are the steps to use the Connect app-
In the Start Menu, search for Connect app and hit Enter to open it.Now turn on the Cast Feature on your device, which you want to cast to your PC.You will see your Windows 11 PC on your phone, tap on it, and you will be able to cast your device to your Windows 11 PC wirelessly.
Uninstalling Wireless Display
If you want to uninstall Wireless Display, you do have the option to do so. To uninstall Wireless Display, follow the steps given below-
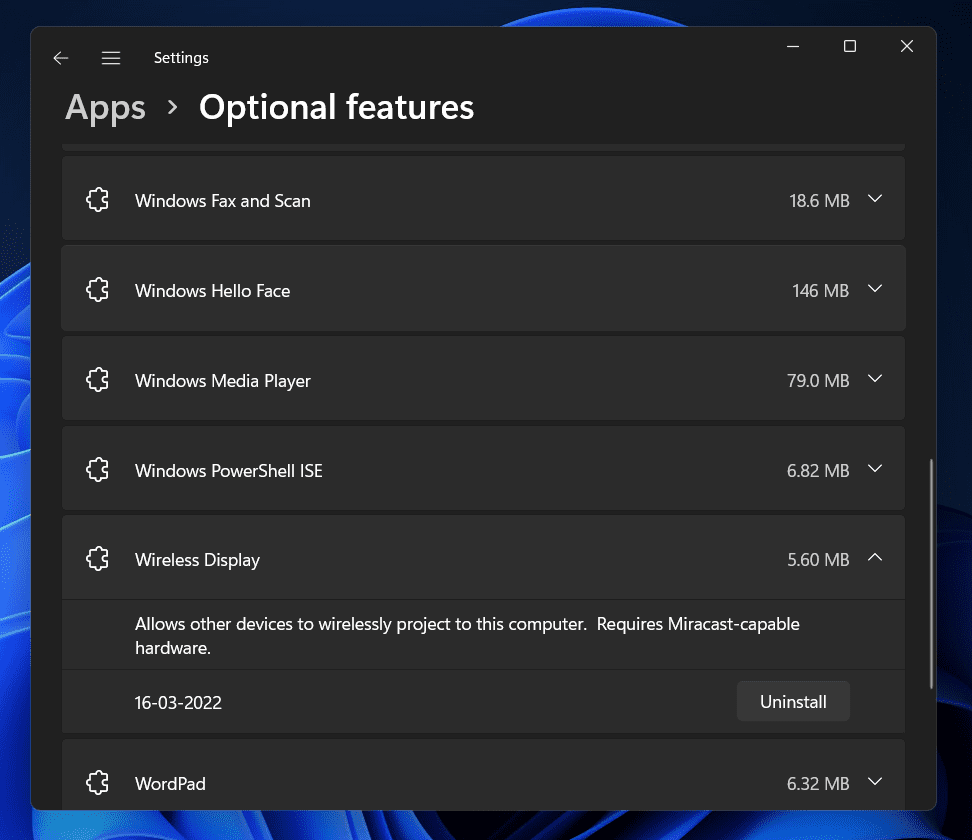
Press the Windows + I key combo to open the Settings app on your PC.Head to the Apps section on the left sidebar in the Settings app.Now on the right side, click on Optional features. Here, search for Wireless Display from the list of features, click on the down arrow right next to the Wireless Display option.
Now, click on the Uninstall button to uninstall the Wireless Display feature.
Final Words
This is how you can install the Connect app on your Windows 11 PC and use it. Following the above steps, you will be able to install the Connect app on your PC, use it to cast other devices wirelessly, and uninstall the app from your Windows 11 PC. RELATED GUIDES:
Fix Windows 11 Bluetooth Not Working IssueFix Headphones Not Working In Windows 11Fix Windows 11 Blue Screen of Death ErrorsWhat is WSAPPX in Windows 11: Fix High CPU Disk Usage
Δ